Once you’ve configured and activated your shared hosting/reseller email service, you can proceed to set up your email account on your iOS device. We recommend using Secure Sockets Layer (SSL) settings that will prevent third parties from viewing your email. Use the following steps to set up shared hosting/reseller email with SSL on iPhone. This guide uses iOS 11, but you’ll find the settings similar for other versions of the iPhone software.
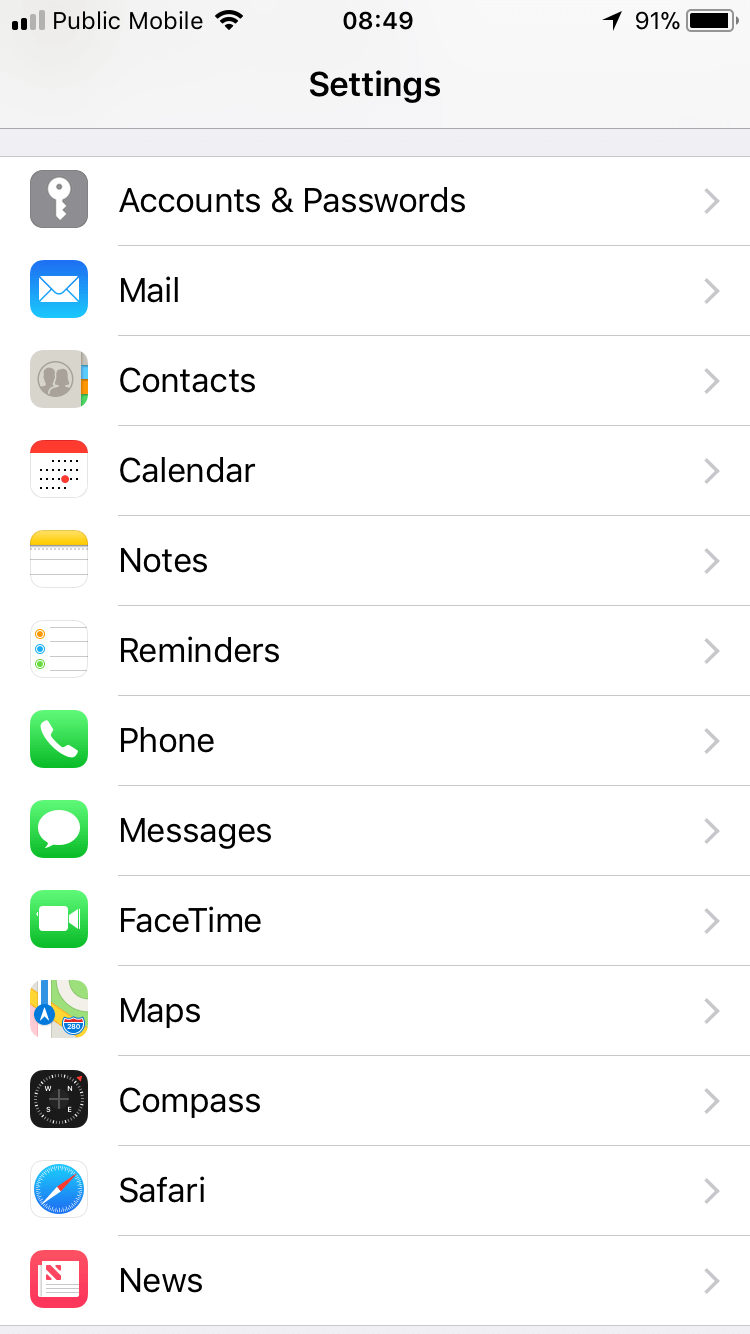
To start, tap the Settings button on the home screen.
Now tap Mail.
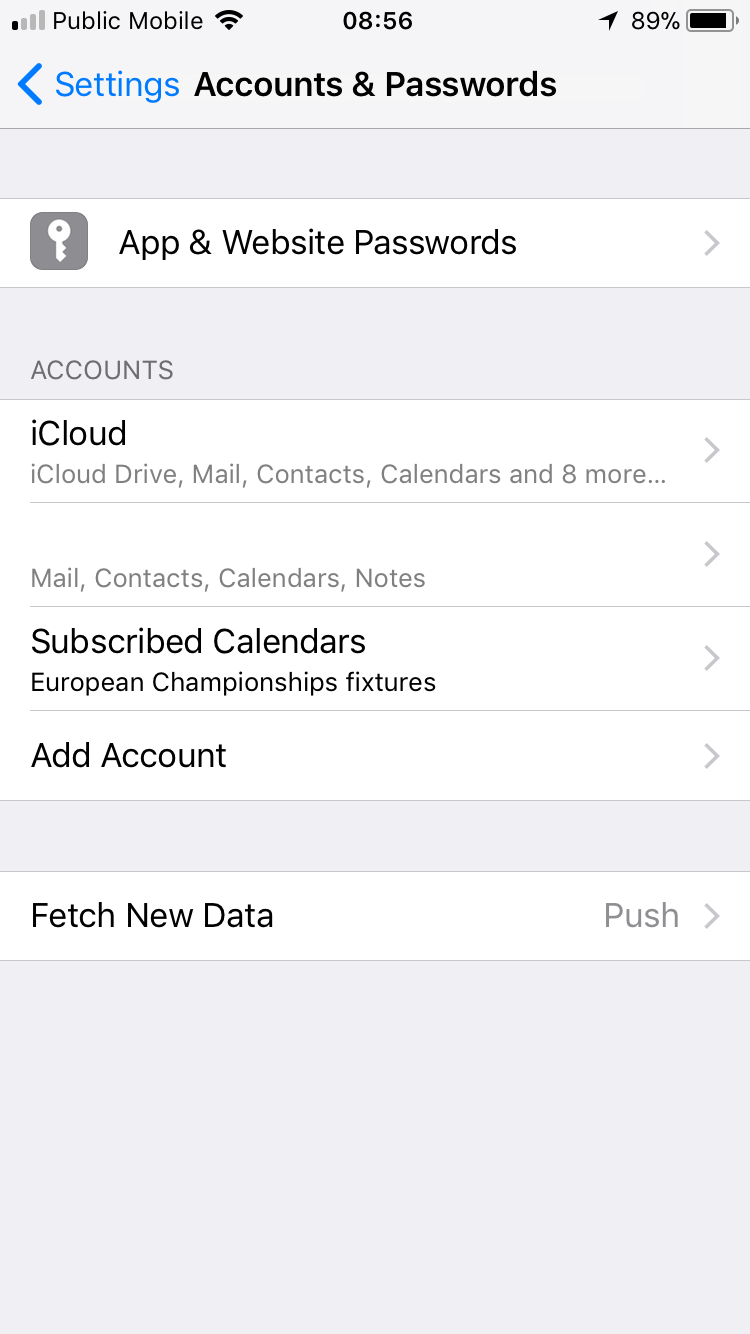
Tap Add Account.
A list of email providers will appear.
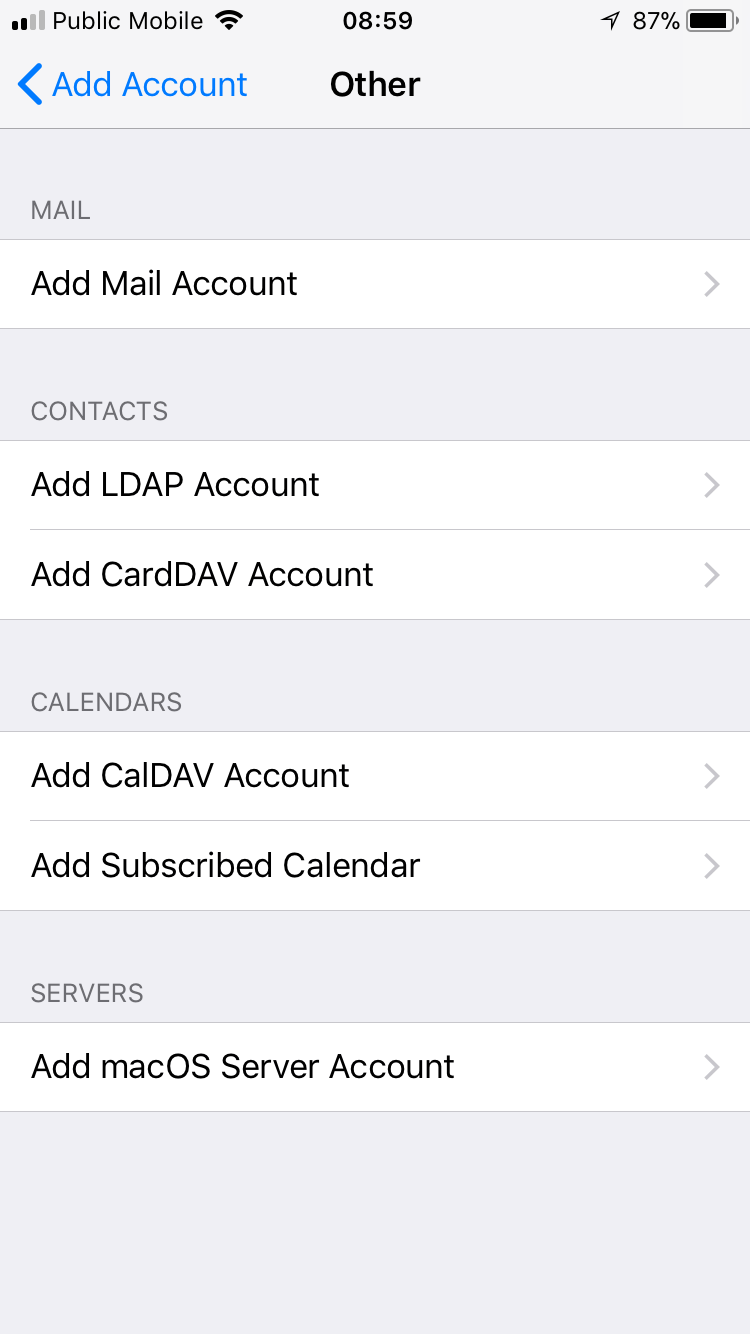
For HostPapa POP3 and IMAP accounts, select Other.
Now tap Add Mail Account.
Enter the following details:
- Name: Enter the sender name you’d like to appear on your emails.
- Email: Your full email address.
- Password: Your email account password.
- Description: A description to identify the account.
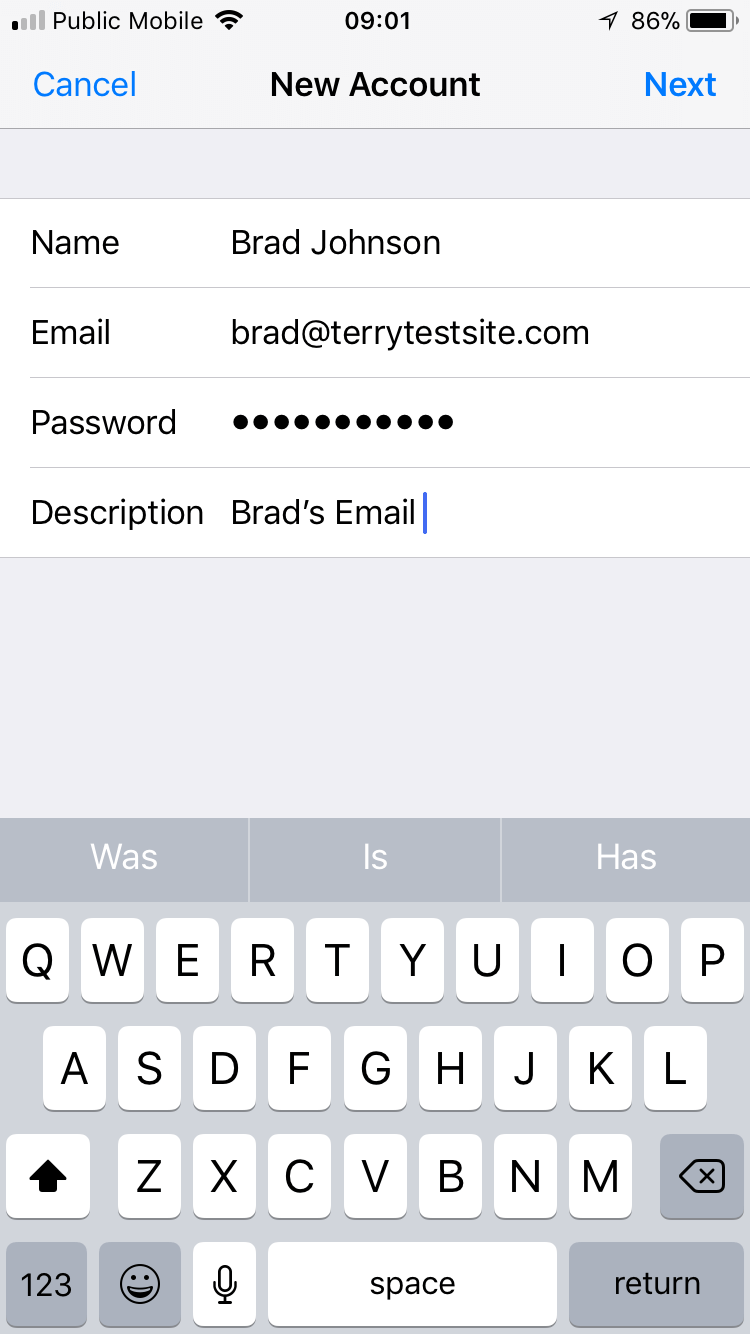
Tap Next to continue.
You can now choose to configure an IMAP or POP account by tapping the respective tab. Your selection will be highlighted in blue.

For Incoming Mail Server configuration, enter the following details:
- Host Name: For POP or IMAP accounts, use mail.yourdomain.com
- User Name: Your email account user name.
- Password: Your email account password.
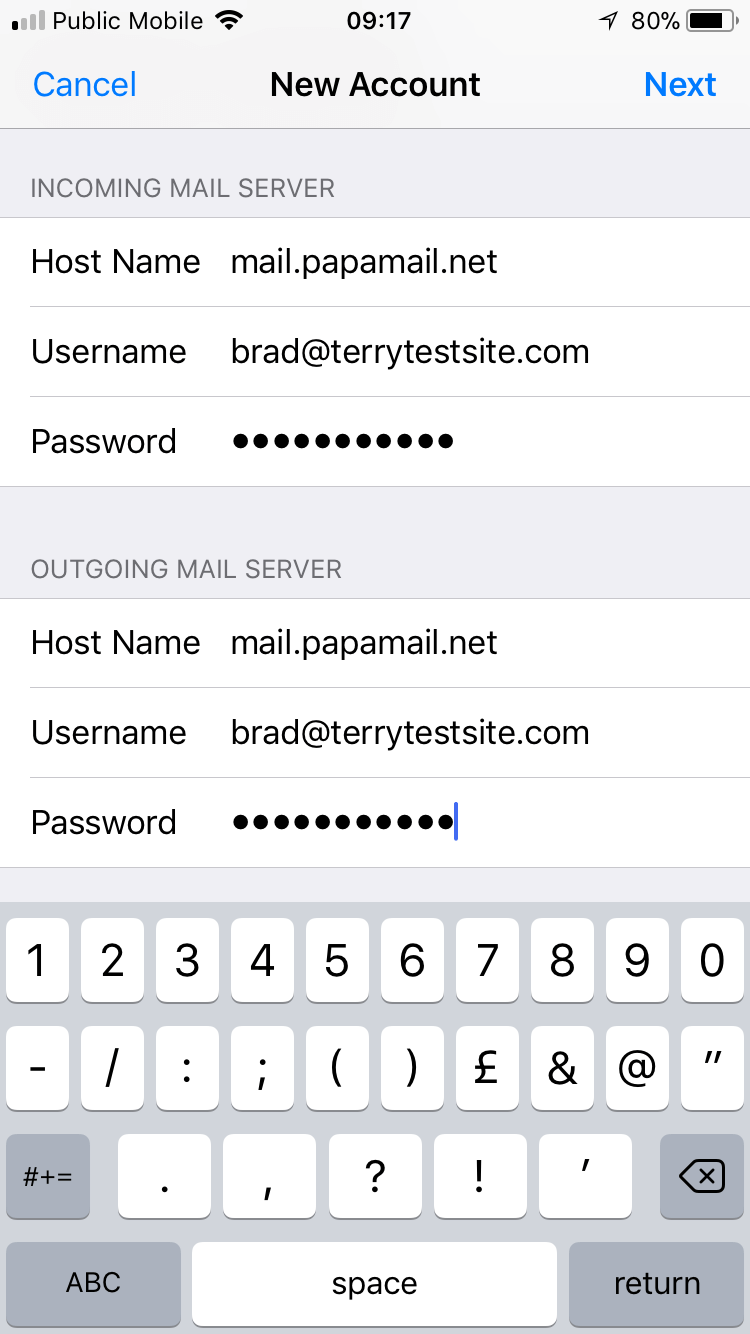
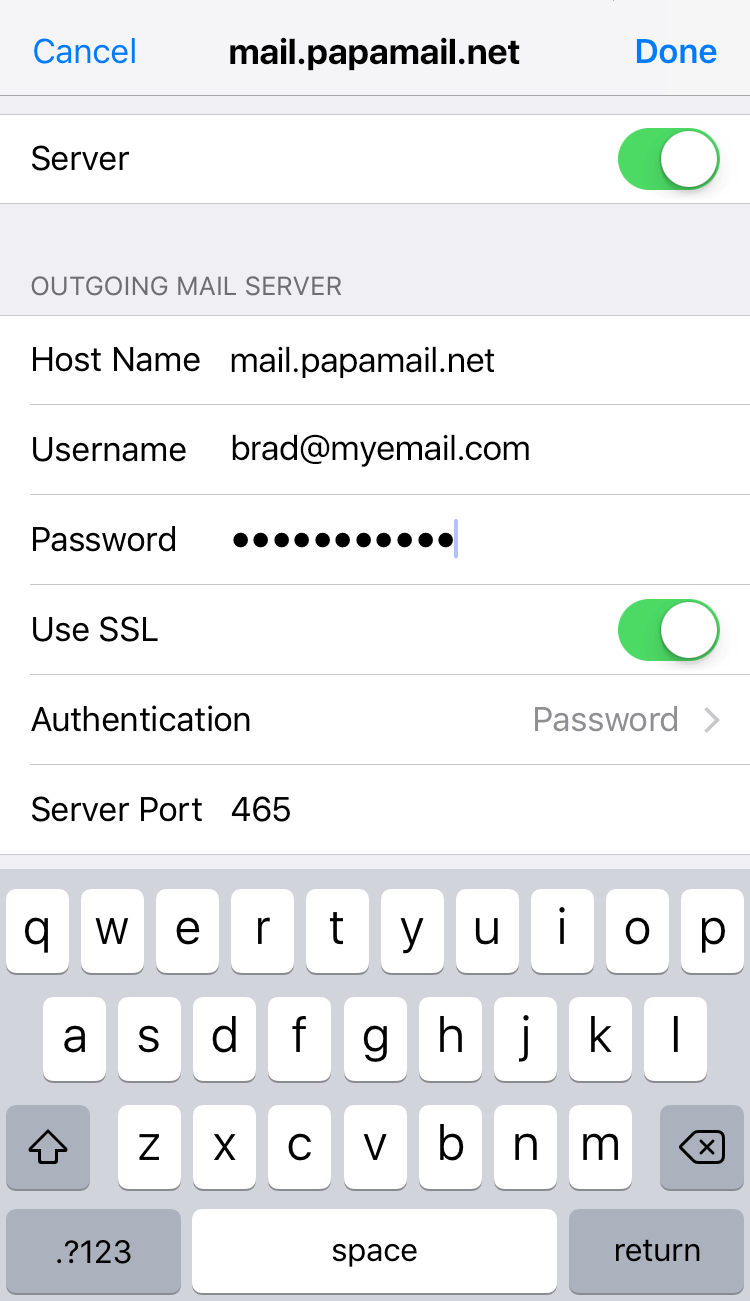
For Outgoing Mail Server configuration, enter the following details:
- Host Name: For POP or IMAP accounts, use mail.yourdomain.com
- User Name: Your email account user name.
- Password: Your email account password.
Tap Next to continue, then Save to verify the details entered.
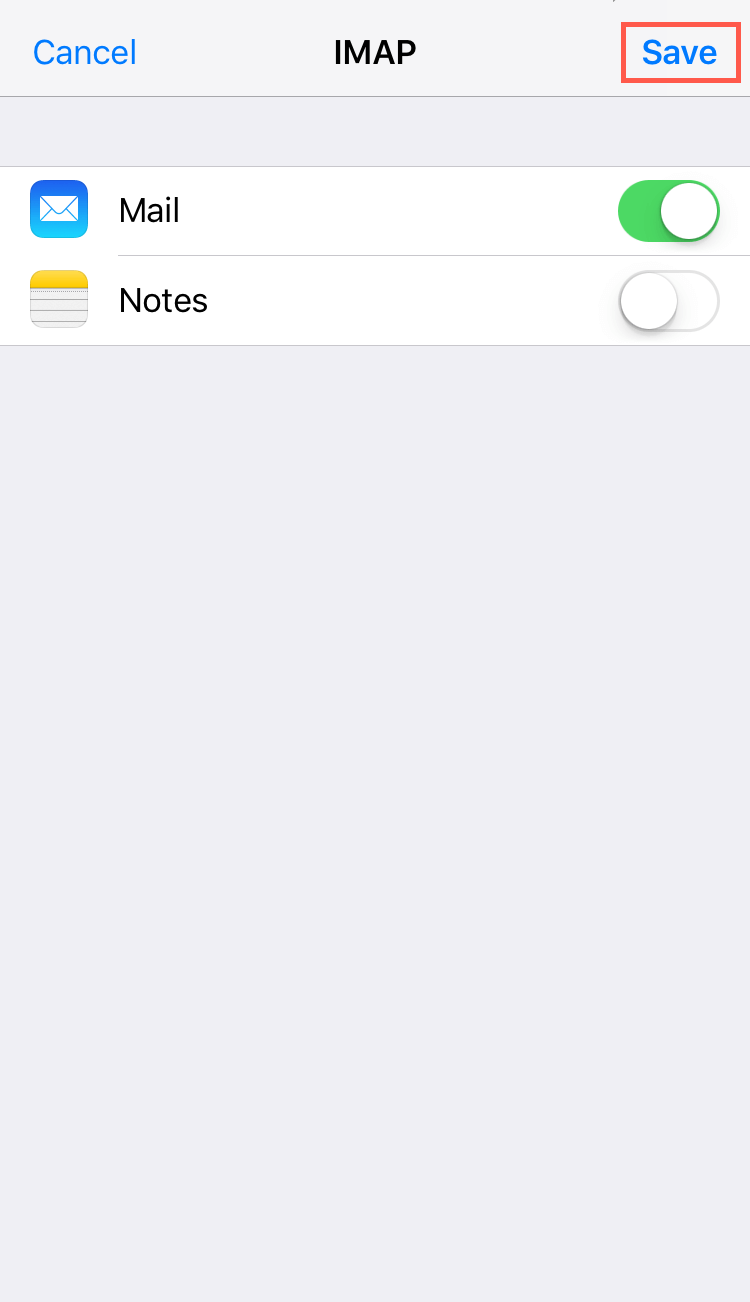
You will be redirected to the Accounts & Passwords screen. Tap your newly created account to continue, then tap your email address on the screen that follows.
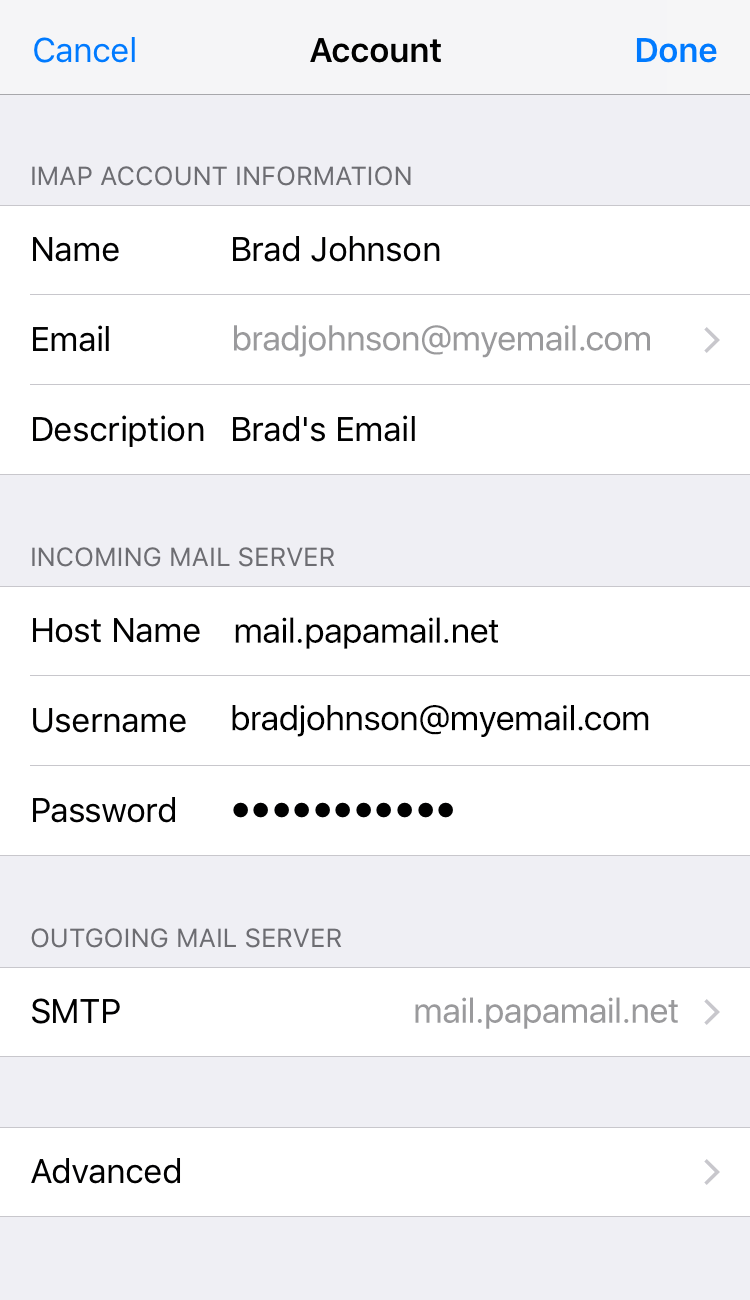
In the Account details screen, scroll down and tap Advanced.
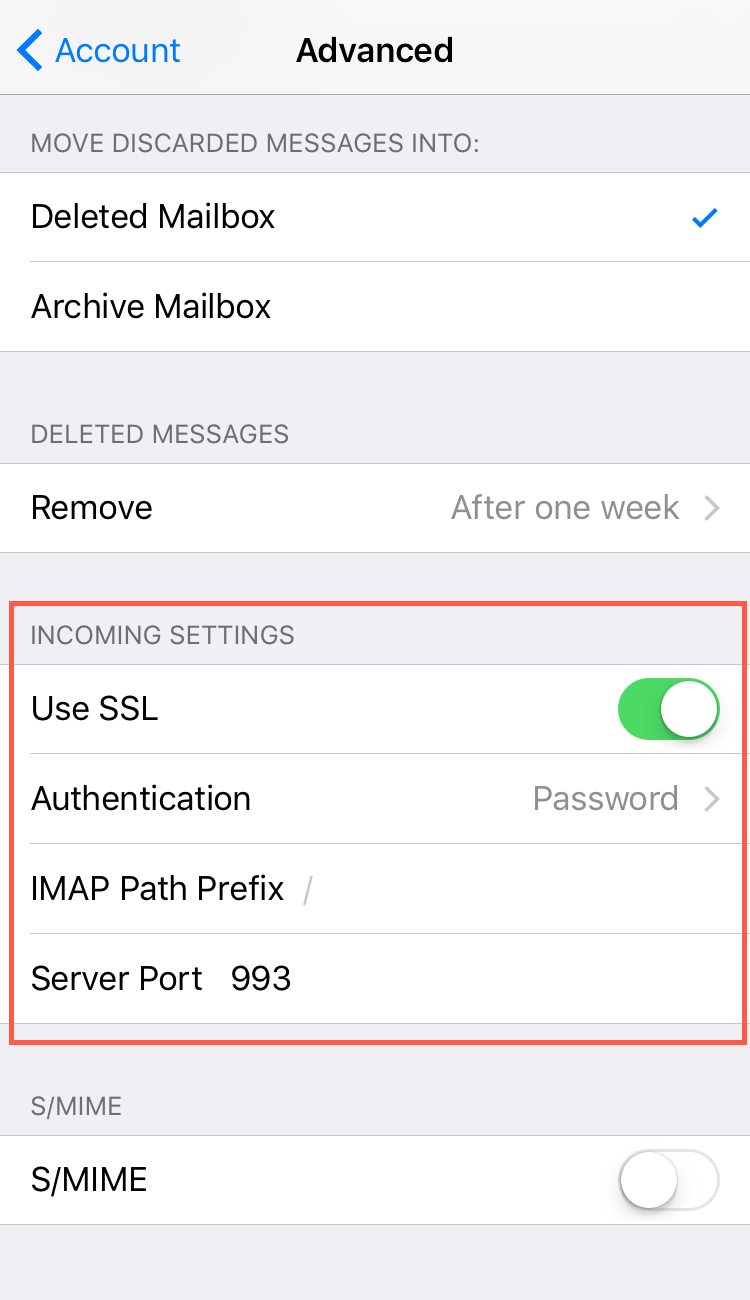
Enter the following details:
- Incoming settings: Ensure the Server Port is set to 995 for POP accounts, or 993 for IMAP accounts. Ensure Use SSL is selected.
Return to the previous menu by tapping the Account button at the top of the screen. Scroll down to Outgoing Mail Server and tap the SMTP entry with the hostname of the server. Tap the hostname again, which will be listed under Primary Server.
Enter the following details:
- Outgoing mail server: Ensure the server port is set to 465 for POP or IMAP accounts. Ensure Use SSL is selected.
Tap Done. The server details will now be checked, and your email account should be available for use.
If you need help with your HostPapa account, please open a support ticket from your dashboard.
